Pro Skaters’ Guide: How to Apply Grip Tape to Your Skateboard (7 Tips)
By Kyle Ayling
Updated August 26, 2024
Review Your Cart
Your cart is empty
By Kyle Ayling
Updated August 26, 2024

Setting up a new deck with Cloud 9 Clear Grip Tape.
This is a step by step guide teaching you how to apply grip tape to a skateboard — like a pro.
So if you just:
1. Got a new deck.
2. Got new skateboard grip tape.
3. Or you want to learn how to do it yourself.
Then you’ll love the actionable tips in this step-by-step guide.
Let’s get started.
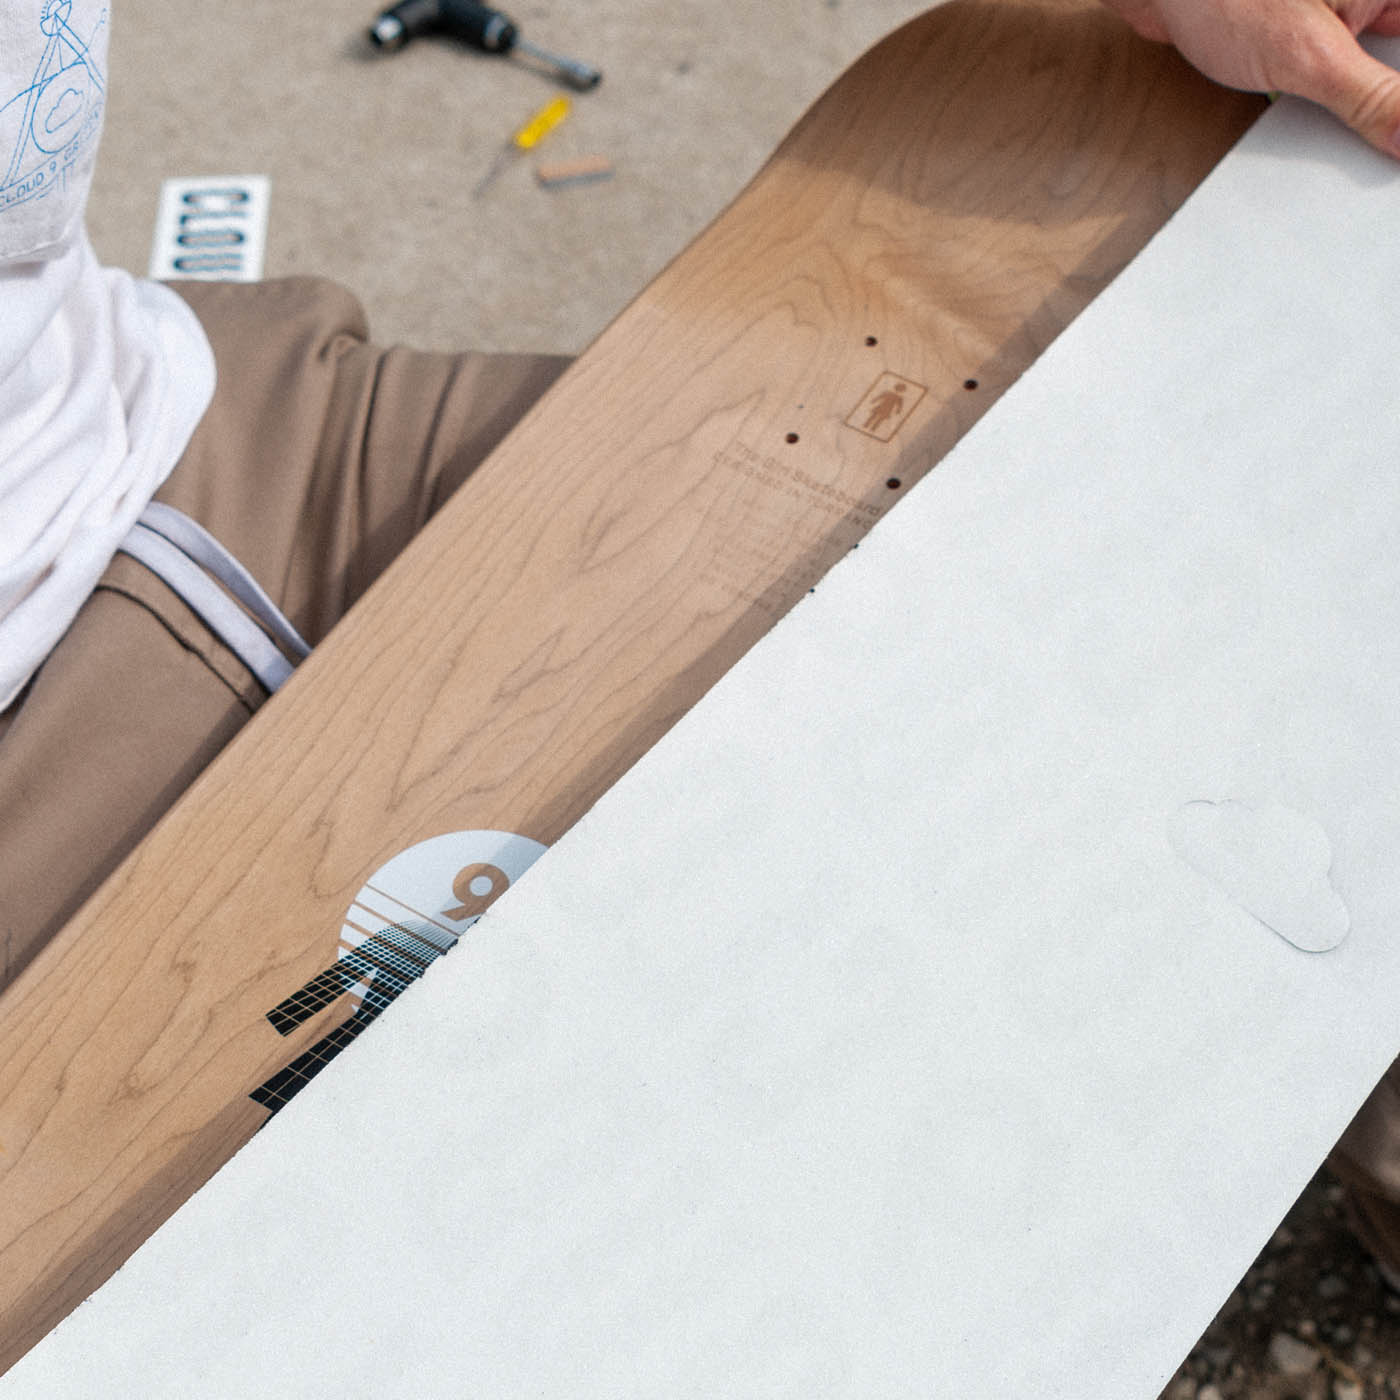
Remove any plastic wrapping, stickers, or packaging that came on your skateboard deck.
You want it to be clean and gunk-free.
You can't put grip on top of grip. It won't stick. More questions answered at the end.
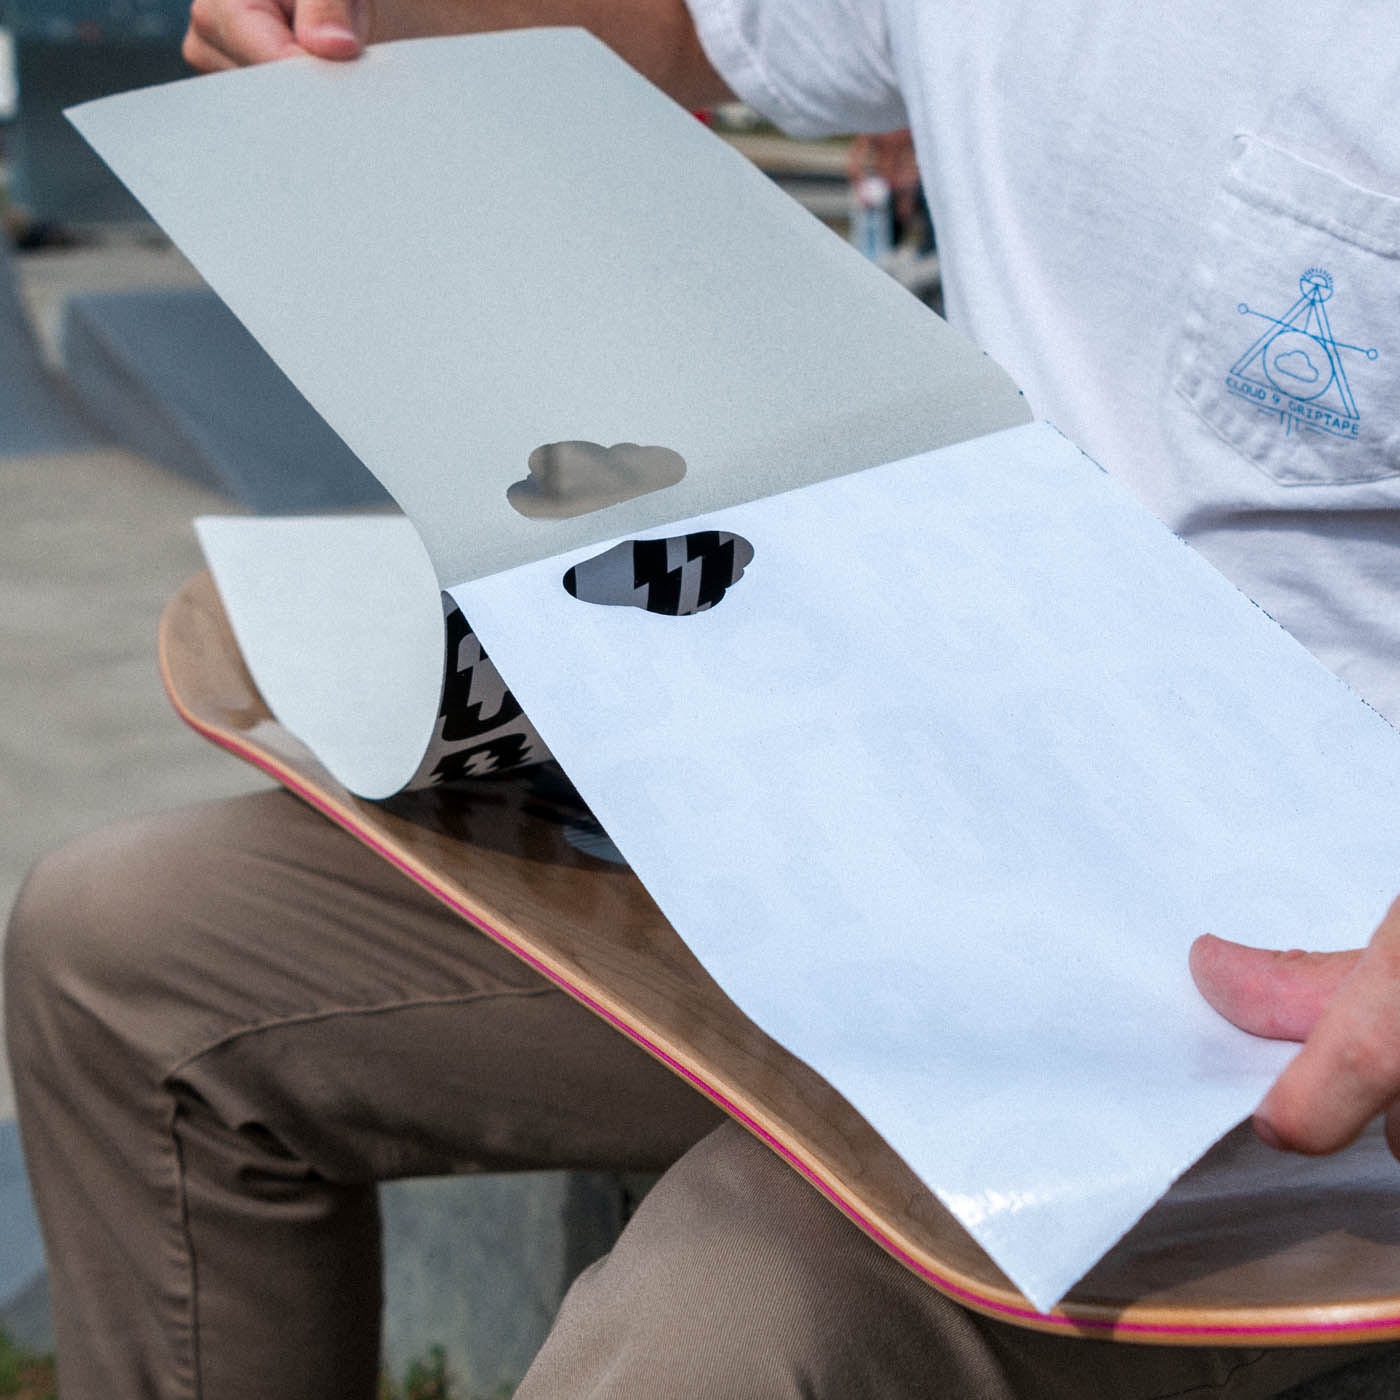
Grab your sheet of griptape.
Peel off the backing paper to expose the pressure-sensitive adhesive.
You can save the backing paper for the next step or just use your hands.
Hold the griptape longways and hover over the top of your deck.
Make sure it's centered.
Stick the grip to the nose of the board, then to the tail.
This will allow you to see if you're centered or you need to readjust it.
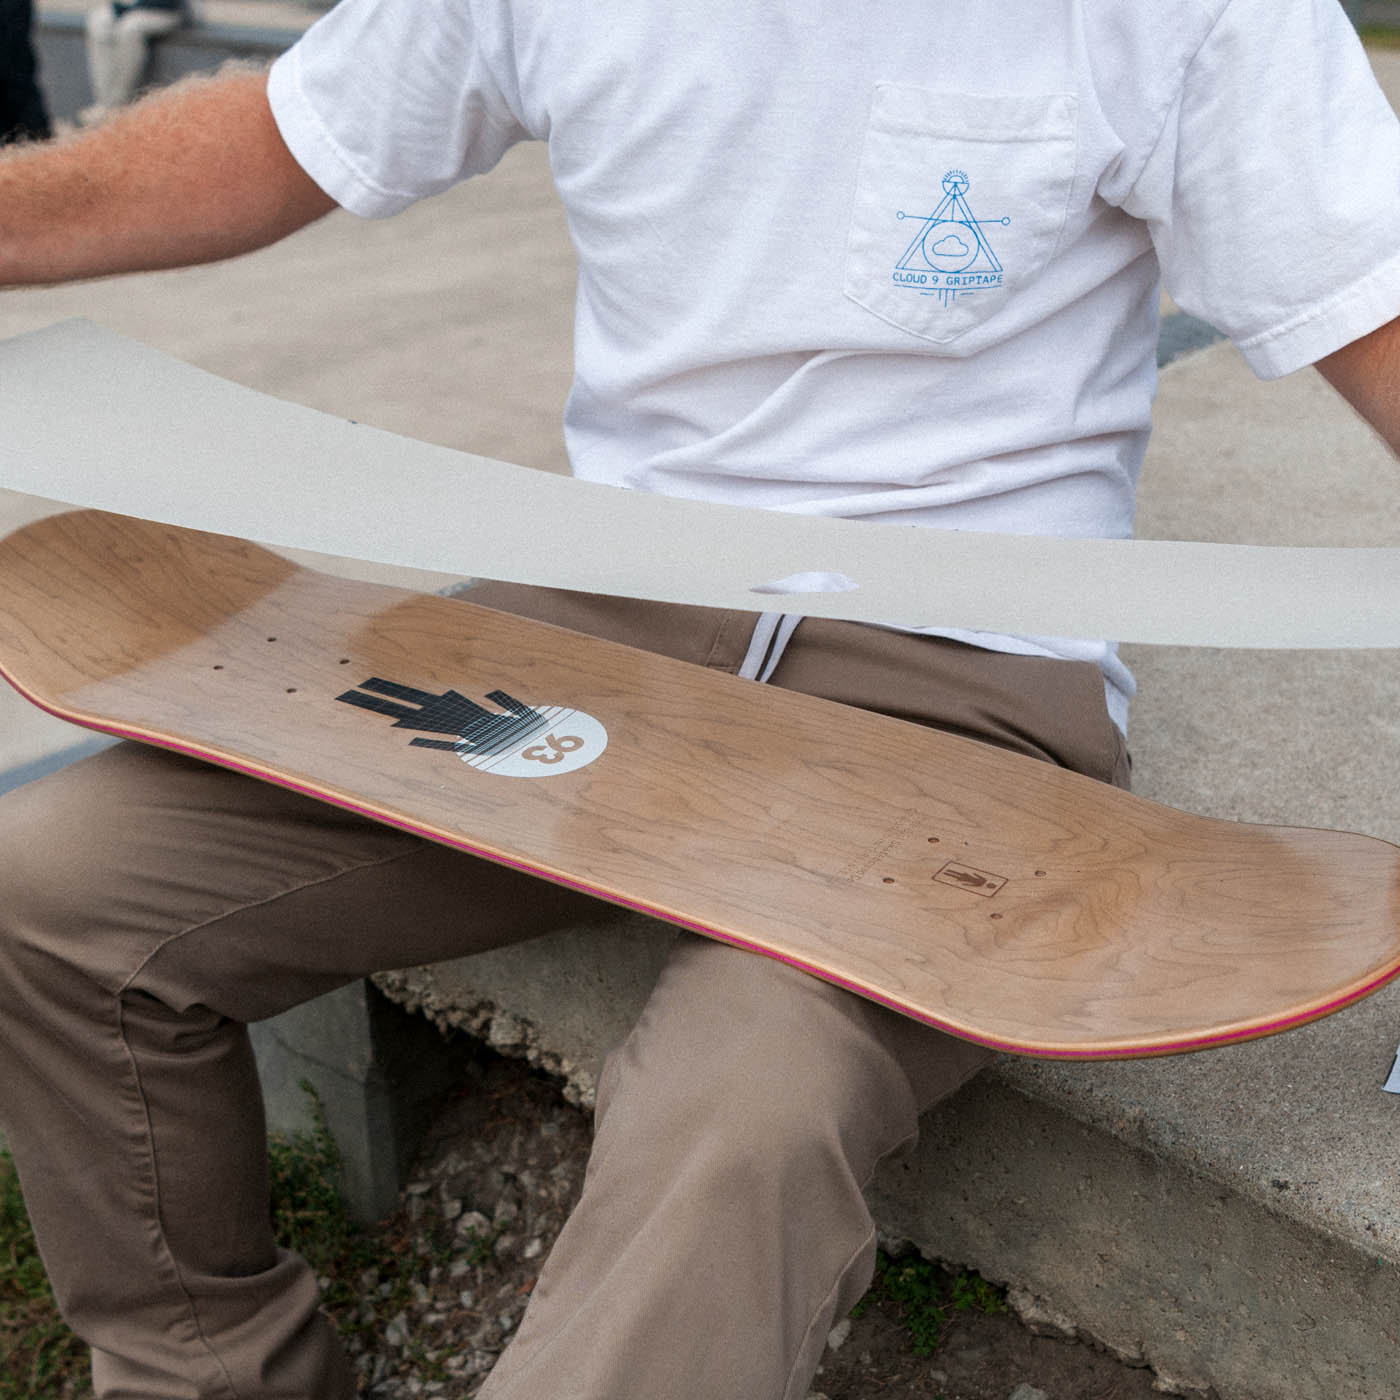
If you didn't press it into place you can pull your grip up to readjust it.
If you like how it looks then use your hands to press it into place.
Begin pressing it down in the center of the board.
And then work your hands out towards the nose and tail.
Do this until your grip is 100% applied to the top of your deck.
Afterwards, you can put your board on the ground and step on it to let any air bubbles out.
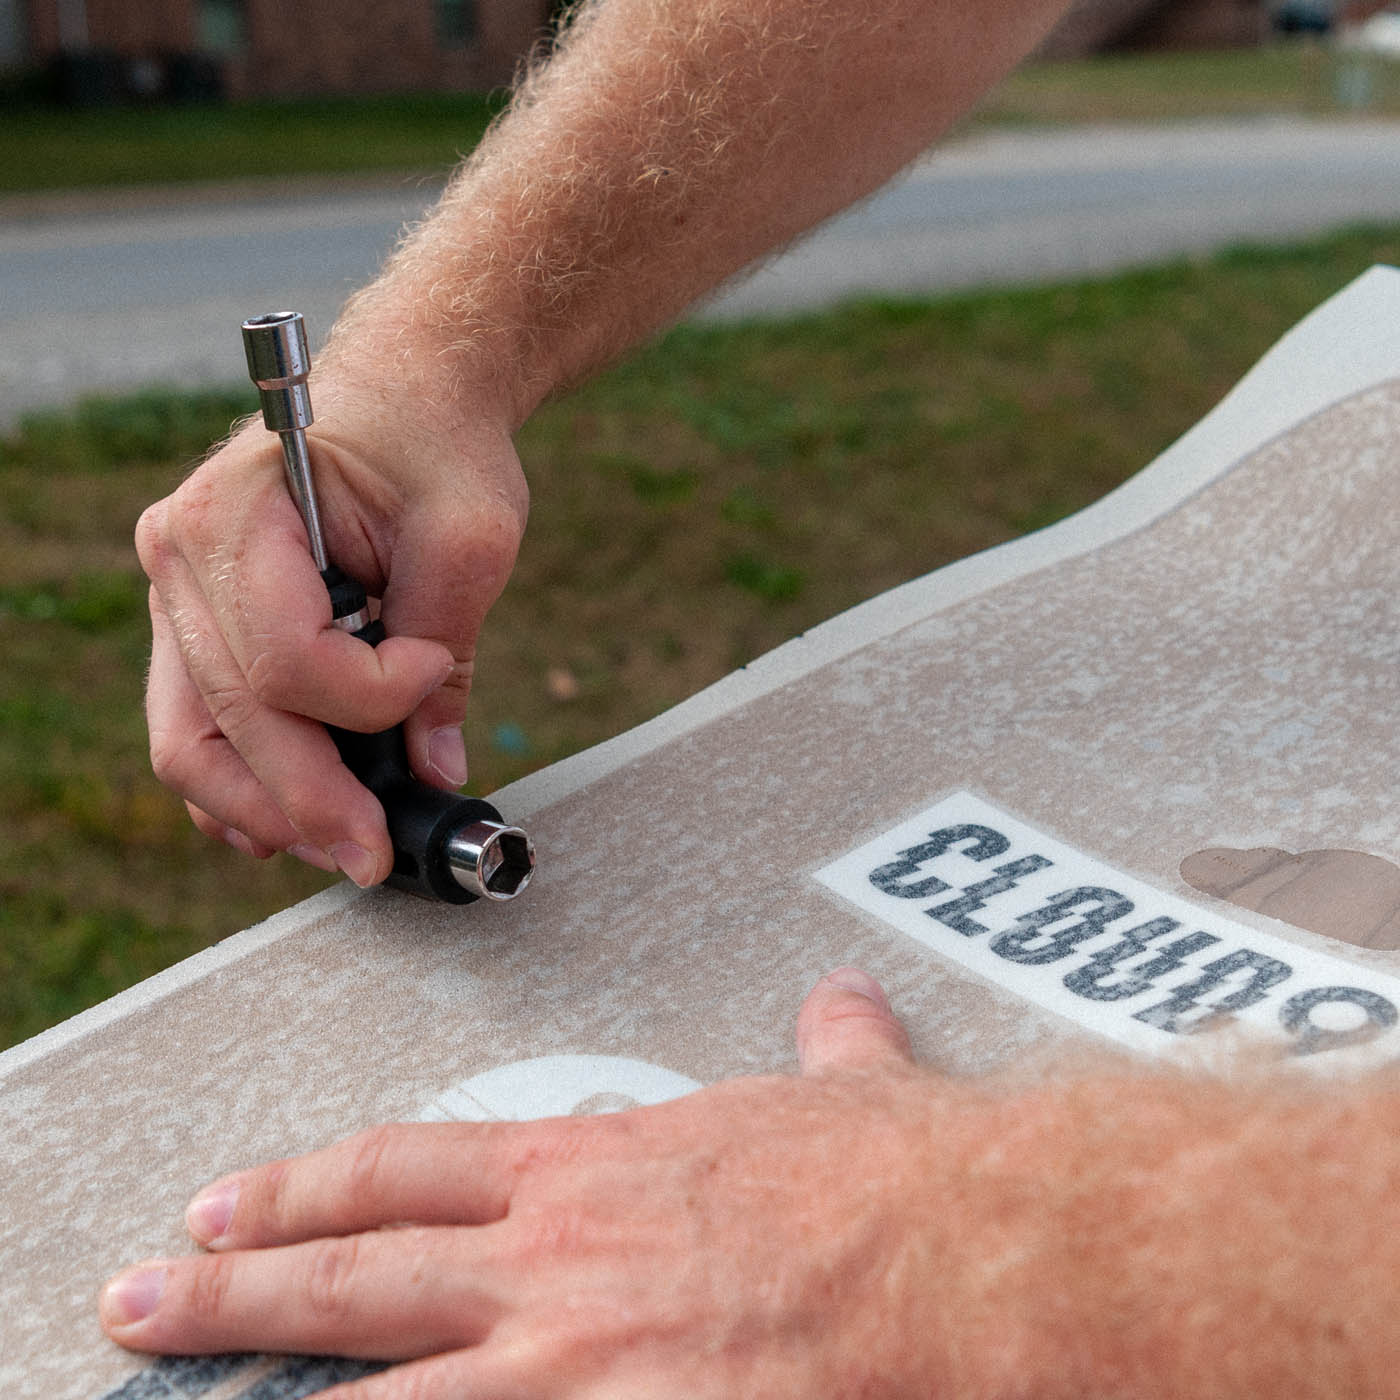
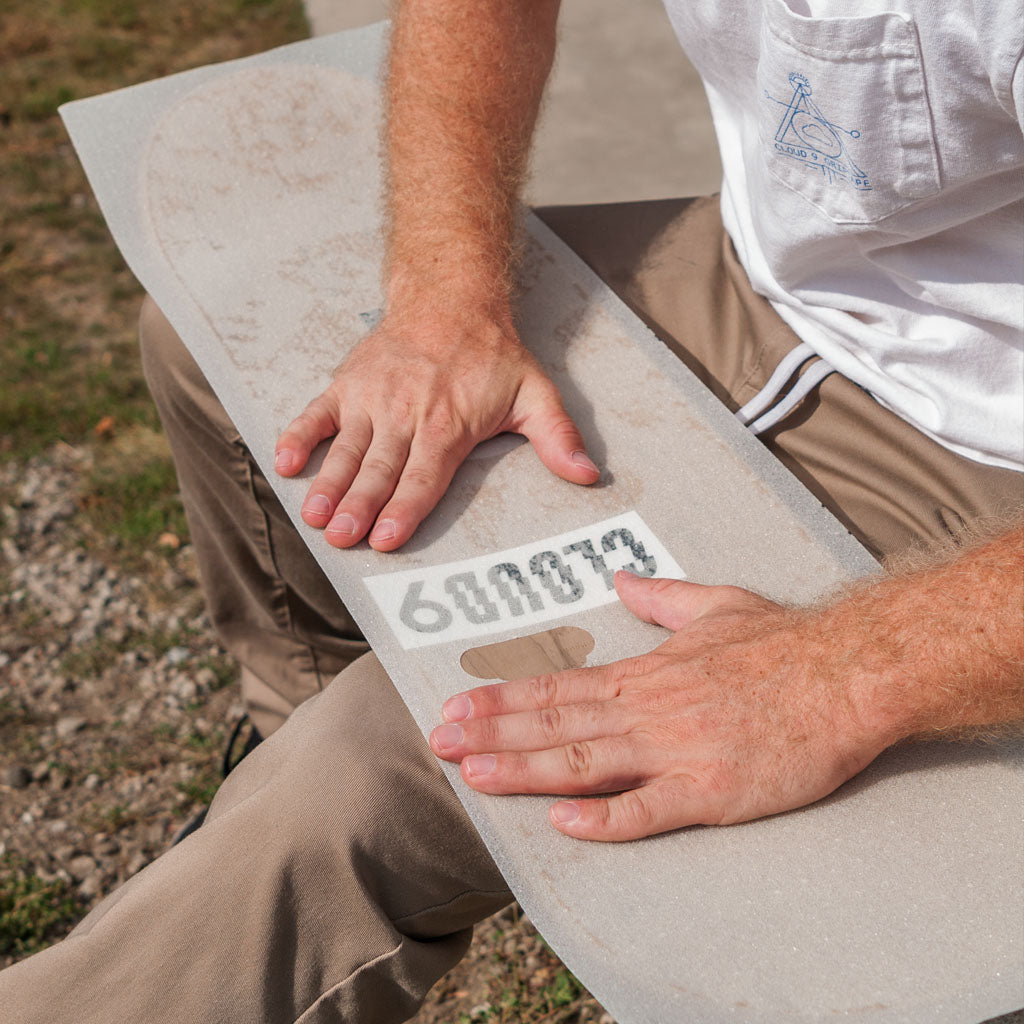
Take the flat file and rub it around the edge of your skateboard.
It'll leave a white guideline to make for easy cutting.
The more you file it, the easier it'll cut.
You can file through the grip. So use caution and don't get carried away.
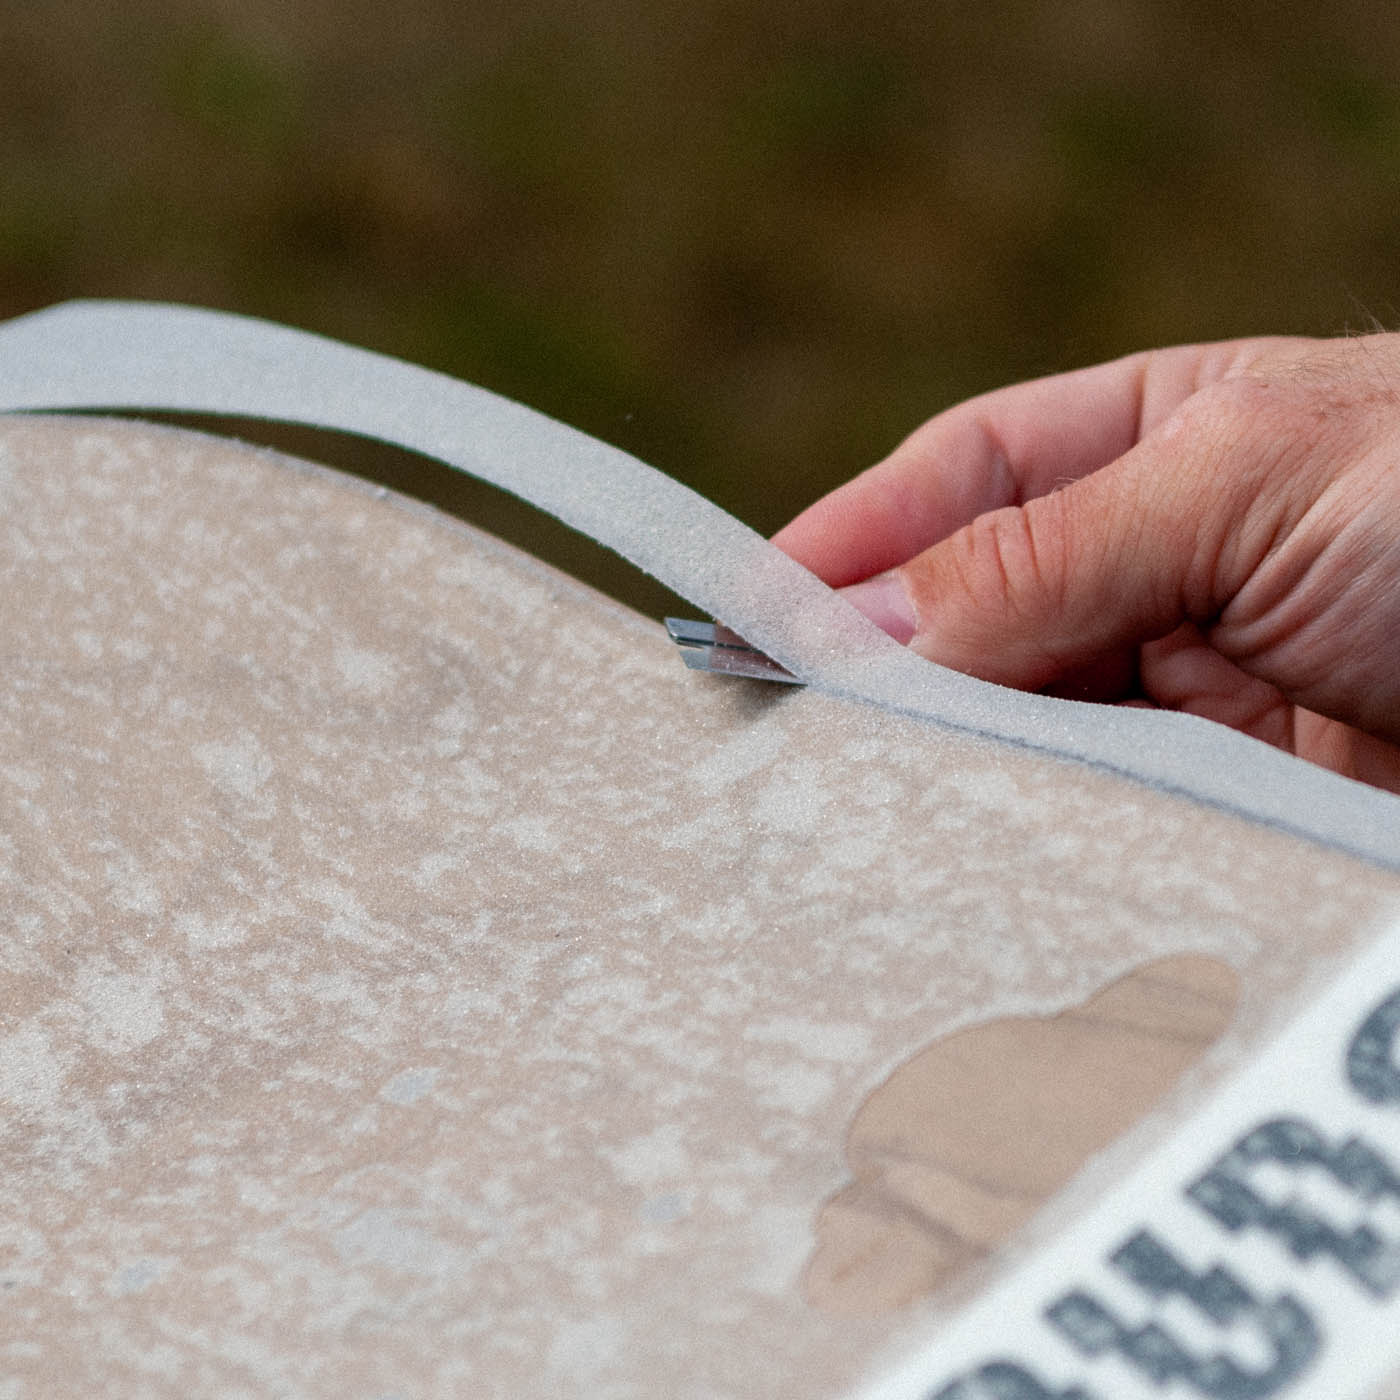
Take your retractable blade knife (or razorblade) and push it up through the bottom of your griptape.
Use the edge of your skateboard as your guide.
Tilt the blade on an angle and cut.
You can cut the grip in sections or one full piece, whichever is more comfortable for you.
And that's how you put grip tape on a skateboard. If this is your first time gripping a skateboard or you want to learn to skateboard, you got this!
Now for the most asked questions — as promised.
No. Please don't put grip on top of grip. It won't stick and you'll be out the money for the grip.
Yes, you should put grip tape on every skateboard deck, regardless of what you plan on doing with it.
All skateboard grip tape has a pressure-sensitive sticky backing. Peel off the backing paper to expose it. Stick it to the top of your deck. And apply pressure to secure it in place.
Pro skateboarders do use grip tape when they set up their skateboards. While the style, brand, and customization may vary from pro to pro, they all use it.
Sure, but please don't. You won't get the precise cut you would with a retractable blade knife or a razor blade. Also, you'll run the risk of the grip peeling up.
Grip up your next board with Cloud 9 Grip. Free shipping. Free 365-Day Returns